Sunday, December 4, 2016

Downsizing: A Taste of My Own Medicine


Downsizing into a tiny house gave me a fresh perspective on the work I do with my clients as a professional organizer. Why are people so attached to things? I often wondered. Why did they keep so much of so little value? After 20 years of coaching others through the process I got a taste of my own medicine. What I had ignored for years now had to be gone through, every drawer and toolbox, every storage box and zippered portfolio. A long and tedious process it was too. I found things that were long obsolete—air mail paper and replacement flashlight bulbs of another era. It all came up for review. Familiar things that had been with me for so long they felt like a part of my identity, a part of what I called home. But through the lens of the tiny house, home had to be redefined. 

As I do with clients, I addressed my hoard in categories to make the work linear and compartmentalized so my mind would feel focused, less overwhelmed. I used other incentives too. I passed along items as high up on the food chain as I could to increase its value. I sold my pre-digital camera equipment on e-bay so I would know it would be utilized by someone willing to pay for it. And I was happy to provide such equipment to appreciative art students. I posted low cash items to free cycle to find those who would value the item — stamp albums from childhood for instance and got a lovely note of appreciation from a grandma and her grandson. I took the trouble to drop off recyclable items at the right places because it was the right eco thing to do. For nice clothes and housewares I chose a boutique thrift store that raised money for a local charity and was staffed by volunteers who cared about the items and moved things along efficiently. Such a venue seemed to make it easier to give away these "too good to throw out" items. Now I know how much this means to my clients. 

Then there are items that regretfully can only be trash. But I was glad the time had come to get rid of all those padded envelopes that had secreted themselves between things. I kept back one to return a part I mis-ordered worth only $3.49, but it took returning it to make me feel better about it. 

The rest of my life had already been downsized by changes I had made over the last 20 years as I describe below. Still the discipline of 150 sq. ft. would push that even further.


Clothes

Some categories were easy. Being forced to part with clothing gave me permission to cull out pieces that were perfectly good, but that I felt ambivalent about and just needed a reason to give away. I didn't have a huge collection of clothes to begin with since I had stopped buying new items when I joined a yahoo group called The Compact in 2006. Started by ten friends in San Francisco after they realized that they spent every weekend at the mall, they made a compact to buy nothing new for a year then opened their group to the public. A bit of publicity swelled their ranks to 1,000 in a week. I hadn't been spending every weekend at the mall, but I had ordered clothes regularly from an online discount store. The clothes were such bargains that I had felt compelled to stock up as so many people do. The group encouraged thrift shopping and DIY projects. Refashioning clothes came into my consciousness.

As part of this up cycling practice I started sewing shirts cut down from large men's shirts I found at thrift stores in fabric I liked. Sewing my own clothes kept me more interested in wearing the same ones, confident that they were unique and timeless. 

After the culling I measured what was left in my closet  and went back to my tiny house floor plan. I allotted a bit less of that measurement as my space for clothes—a 36" rod for hang space and shelving on either side for folded pants. A 4" space on both ends would hold t-shirts folded in quarters lengthwise. Six feet of closet space in all; relatively large for a tiny house even though it would mean dressing in the loft lying down as one would in a tent. I would have a sleep in closet as it were. From a tip online I squeezed in more space by switching out my fat plastic hangars for skinny metal ones. I liked those plastic covered drip dry hangars of old but they were no longer available in stores and I wanted sturdier ones than wire ones from the dry cleaners. I ordered three different kinds before I found sturdy chrome ones. Sixty was just enough with the handful of drip dry ones I already had.

I also added my chest of drawers to the mix. The contents of the top drawer had so many categories of little things I couldn't face going through it all. The top of the chest also doubled as my dressing table. While the bottom drawer contained my prized collection of board shorts. This was enough to justify finding a place for it at the back of the tiny house next to the shower pan. The bottom two drawers would hit the wooden box of my toilet and thus only open hallway, but I could always move the toilet out of the way if required.

The chest also had sentimental value as it was one I had from childhood that I had, in my twenties, hand painted in a turquoise sponged on a cream background and decorated with a stylized design of arrows copied from a native American painting I had admired. The front had black lines of a geometry inspired by Frank Loyd Wright and the handles were bright red. The piece being a remembrance of the design influences of my youth would tie in nicely with my teal green kitchen cabinets and the red desk. My color preferences having remained in the same palate. 

In the final reckoning I was able to cram all my hanging clothes that I wore everyday onto the rod. The cramming inspiring more culling until everything fit easily. The shelf space for pants was just right and the space for t-shirts was twice what I needed. Huzah—a bonus space to stash things. Under the eaves the odd triangular spaces were perfect for folded underwear. There was still my fancy dress clothes many of my own design that I had sewn myself. I thought to store them offsite, but I found large storage boxes with lock down lids that would just squeeze in under the house. I got four. One for the clothes, one for boots and dressy shoes, one for bags, one for cycling gear. These were my concessions to things I wanted to keep, but didn't need on an everyday basis.


Office

My book collection was much more difficult for the books were chosen for their usefulness as reference books for gardening, home repairs, clothing design and carpentry. Skills for when the grid went down and there was no internet access. Not to mention my collection of large books on tiny houses that would serve to educate visitors. I faced this challenge by building as many shelves as I could fit up the face of one wall where my desk would be and over the area where the seating would be. This endeavor took a while and drove home the point that if you are faced with building storage space for everything you want to keep you have to work really hard which might lead you to think twice about what you choose to bring on board. I also had an interim solution. I installed shelving in an unused closet in my stepmother's garage where I could stage the books until I figured out how many I could fit on the shelves I was building. And either store or give away more books.

The more arduous task of culling came down to the little things—office supplies, stationary and bathroom sundries. Things tend to accumulate if you have the space. Pads of paper, printer paper of different weights, envelopes bought in bulk, fancy gift notebooks, pens; all of it mostly gifts, free samples and giveaways. This was the territory of it-could-be-useful-one-day. 

A surprisingly easy task was culling photos. I had already done the work of putting them in albums and had organized the remaining ones chronologically. The ones in the albums were enough I realized and threw out most of the old, distributing a few among friends. Sometimes being hyper organized does pay off.

My two drawer file cabinet had to go so all my files had to be gone through to reduce everything down to what would fit in an ottoman storage unit and a rolling file cart. The rolling file cart would also hold my flatbed scanner and the ottoman would be home for my shoulder bag for everything now had to do double duty as well as fit under my desk. For my laser printer I built a specially sized shelf above the desk. This reconfiguration reduced my entire office to half the space. And I could still have my Xena Princess Warrior action figure riding my art class clay elephant on my window sill along with my glow-in-the-dark virgin Mary statue and my vintage all metal postal scale.


Bathroom

The bathroom was easier. I had revised my bathroom sundries in my search for less packaging. I now made my own toothpaste from baking soda, salt, mint extract and glycerine. I washed my hair with baking soda chased with an apple cider vinegar rinse. This left my hair squeaky clean, but the biggest benefit of this regime was that I only had to wash my hair every other week since it now maintained a healthy grease free look. (Shampoo is the cause of that greasy look since it is a detergent that strips the natural oils from the hair stimulating the hair follicles into overproduction of oils to replace what was stripped off.) Not having to wash my hair every other day was the reason why I knew I could live without hot running water and a shower head in my bathroom. For this twice a month ritual I could plan to go to a friend's house and wash my hair. 

And except for hand washing I don't use soap because it dries my skin. I brush my skin with a natural bristle brush as I bath. After I dry off I rub olive oil into my skin and a little lotion on my face. And I like a heavy duty cream for my feet and hands. For deodorant I use a mix of cornstarch and baking soda as needed. Thus I had cut out all the astringents, toners, bath gels, facial and body scrubs, scented lotions, specialized soaps, conditioners and shampoos that don't work after a month or two but were so expensive you keep them in the hopes of rotating them back in as you switch brands. I also don't wear make-up. I had basically returned to a lifestyle more familiar to our pioneer grandmother's. In my work I have observed that most women have an average of ten banker's boxes of sundries stuffed into their bathroom. I had just three small drawers for my toothbrush, contact lenses and neti pot. All plus travel kits fit in my two much longer drawers installed into the end of my kitchen counter.


Kitchen And Utility Closet

The kitchen was simple. I just brought over what I was using and enough dishes and silverware for four which was as many bodies as I could imagine entertaining inside the tiny house. The depth of the kitchen counter created ample space in my cabinets. I had measured the heights and widths of my pots and pans and planned what food items I wanted to store, as well as all the lunch boxes and thermoses so all the shelving was at the right height for everything. 

On a tiny house forum someone had said that you would be surprised how much you can fit in so don't be in a hurry to throw everything out. This proved to be good advice as I devised ways to support all my on board accessories by bringing my things over a little at a time and finding ways to store it. A client who had owned a VW bus she traveled in for two months told me how she stored fruit in net bags hung on hooks. This was a useful idea too and I put up such a bag which I ended up using for recycling. I also installed 3 hooks to hang my large collection of caps and hats. My jewelry became decor as I hung a rack up in front of the window over the toilet and arranged all my pendants in a pleasing composition.

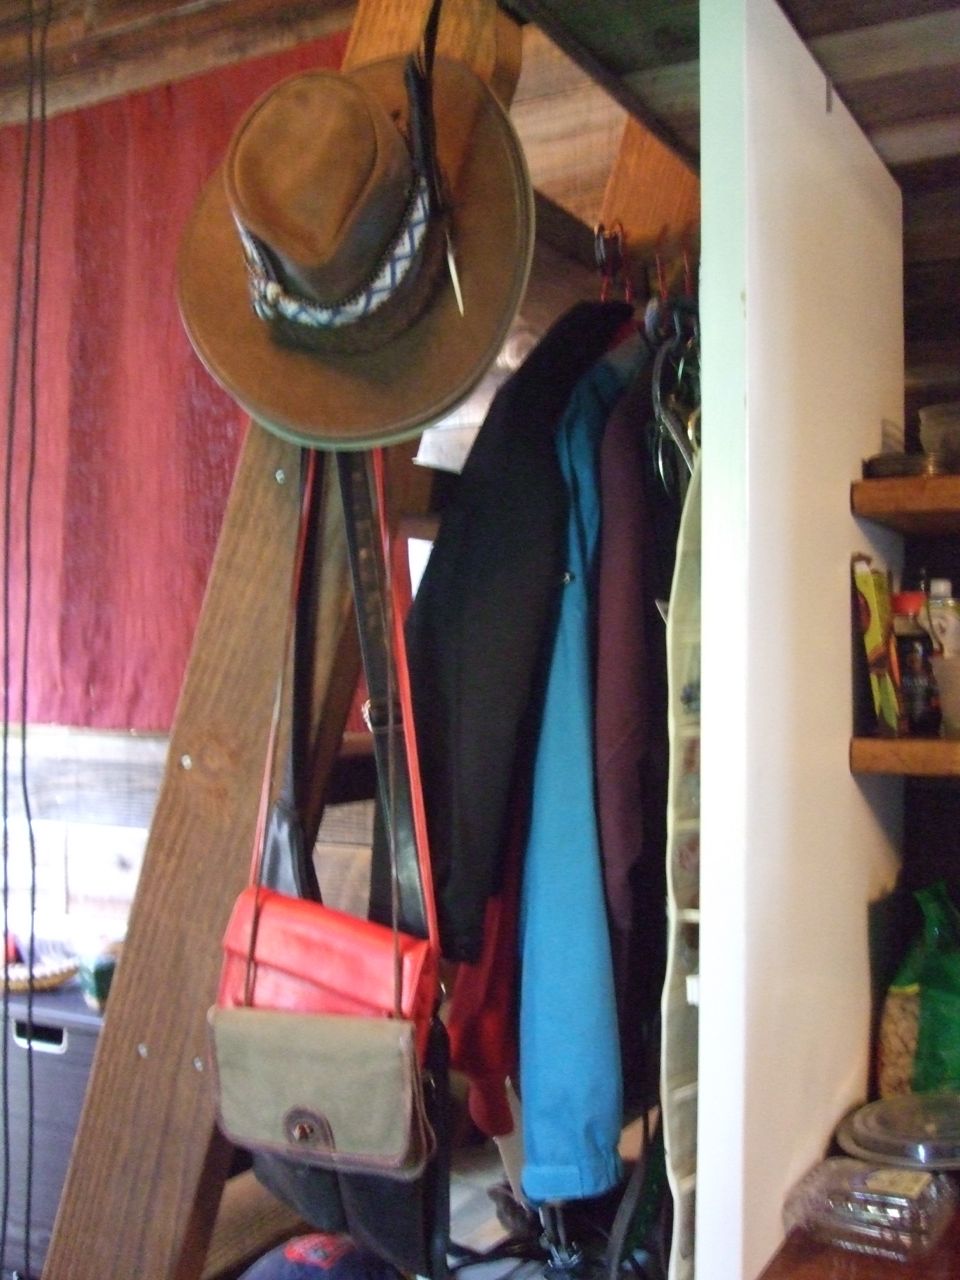
Under the stairs I had installed a short closet rod for a coat closet (and a shorty folding ironing board). This I had planned in the original layout cutting back the kitchen counter by nearly a foot and installing a wall at the end of the counter to support the side of the coat closet. On the closet rod I also put a hanging jewelry organizer a client gave me that would prove immensely useful with all of its see through pockets. As I swept through my old room picking up all the little things lying around that I didn't want to lose—keys to things, ear buds, hearing aid batteries, chap stick, digital memory card, small parts to things, my tiny analog address book—I put them in the pockets of the hanging organizer. This gave me tremendous piece of mind during the move and was apt storage after the move in lieu of a kitchen drawer. 

I also had room under the stairs for my rolling utility table upon which I did my sewing and shoemaking. I would store my sewing machine on it. It fit quite nicely as I had hoped and had a shelf underneath where I kept my sewing gear. The coats hung over the sewing machine partially hiding it. On the wall under the stairs, behind the utility table, I installed hooks to hold my backpack, tote bag and sling bag.The remaining space under the stairs went to tools and a mini vacuum cleaner. 

I made one concession to Ikea, a shoe cabinet by the door I found for half price on craigslist as soon as I thought of it. The brilliance of this shoe cabinet design hiding the shoes and allowing for a shelf for outgoing items. The flat cabinet face and dark faux woodgrain gave a finished look to my foyer. 


On the ladder itself an antique three prong hook would hold small purses, my hat and any coats visitors came in with. One of my storage benches was also dedicated to sewing gear. There was also space in the loft along one wall to park a few things I hadn't planned for—a zippered plastic bag of sewing projects, a laundry hamper and a magazine holder. This completed everything I had had in my one room living space.

I still had lots more I would have to deal with that I had stashed in storage under the house and in the garage. Wood, spare parts, material to fix things, memorabilia. Stuff that had driven my partner crazy, but for now I had what I needed to sustain life in my tiny house. 

There was just one more layer to go. The four walls of artwork I had—my signature piece from art school that later became my business card design, my grandmother's ornate high school diploma, a small abstract canvas a client painted, a mask of a tiger from Mexico. I had to retire my wall size Thai hanging of a walking tiger and a poster size print of the Golden Gate half built. My life is no longer half built I thought as I took it down. What I brought over I hung on the one wall over the door to the peak of the 12' roofline. The spacing was so challenging it took all my sense of composition to get it just right. Interestingly each piece had some red in it that was picked up by the red of the door. The tiny house was thus transformed into a gallery space, a place of purpose befitting a working artist.  

As a finishing touch I had an alpaca fur wall hanging I got on my recent trip to Peru to put over my couch. I hung it over the mirror that I had already installed there and this made the space more traditionally a sitting room. Now it was home and I was ready to show the house. Just in the nick of time as my first visitors were documentary filmmakers traveling across the country in their tiny house. I had met them at their tiny house presentation and a few days later they dropped by to interview me. And what fun it was showing off my handiwork to fellow travelers who would appreciate all the compact design innovations I had installed.


Thursday, December 1, 2016

Moving To The Site

Been too busy to post so I'm catching up with this report to mark the move which took place on 10/7/16. 

Nearly four and a half months and the tiny house was finally ready to move to the site where I would live in it. We had done all the work that would need a table saw. Tim installed trim around the shower surround using wood cut from nicely seasoned wood from our old deck. While I installed a shelf dedicated to my printer that would get it off my desk. And a short closet pole installed under the ladder for my coat closet. In the every inch counts department I added a shelf to the back of my desk behind the supporting cross piece. This shelf would hold all the wiring to my office equipment off the floor. I cut it from a door and the hole where the doorknob would go I placed so the cable to the power strip could fit through it. I also took the trouble to cut the printer shelf so I could fit the power cable up behind it at the corner. This kept any cables from having to be draped across my field of vision. Time consuming, but it was worth it.

Since the new site did not have quite the walk around access to the front door, I thought it would be prudent to move any large pieces of furniture into the house first.

This included my signature red desk. What a poignant moment that was when the red desk left the only home it had known. With it came my hand painted dresser.

Tim and I rented a pick-up truck and hitched up the tiny house. As we backed out we heard a bang inside the house. I thought I had secured all the furniture by wedging everything up against each other so there would be no movement. Looking inside I couldn't see anything amiss so we continued making our slow careful journey down the road with me driving behind to watch out for low hanging wires. Later I would discover that the bang had been the kitchen drawers sliding out over the shower pan. There being nothing to keep them closed, but no harm done.

Despite nearing rush hour traffic we made the short journey without annoying anyone. The challenging bit was backing the house into the tight space, but Tim was adept at this once I became his eyes. Luckily there was no traffic in the street as I stood out there with my white hard hat on playing the part of the construction boss. This may have eased our delivery when the local sheriff cruised by, stopped to talk to some neighbors catty corner from us and then left when it became clear what we were doing. We had had to cut some more of the bottle brush for clearance, but other than that my site prep had been perfect. The trellis had been cut back to allow for the door to open just enough though the door did touch the trellis when open. The ground underneath the house I had covered with pea gravel. 

Once positioned I was pleased to see that there was four feet of space between the house and the fence. A comfortable distance. And on the other side almost as much under the canopy of the tall bottle brush. These bushes would shield the house from view from the main house despite the height of the roof. In fact you could really only see the house from directly across the street and for a few car lengths down from the gate in the fence. The whole move had only taken us an hour. 

Later when a friend came to visit I told her she would be able to see the house over the fence when she drove down the street, but when I opened the gate for her she wasn't there. It turned out there was another tiny house visible above a fence just a block away and she had parked there. It was a tree house she had mistaken for my house. Quite a finished looking structure with a peaked roof and real windows. That made me feel more comfortable about adjunct buildings in the neighborhood. 

Saturday, October 8, 2016

House Beautiful?

After my dry run with Sheilagh putting the tiny house through its paces and living in it I realized I needed to address seating. Not just seating for dining, but for lounging around and entertaining. In my planning stage I was thinking hanging chairs and hammocks for their versatility. But now that I had been showing the house to visitors who were curious about my tiny house I acquired a desire to make the house more conventional in the sense that strangers looking in the door could see that it was a home and not a fishing shack. Something that would read "house" in the sense of cultural icons that represented what people could identify as a home in a magazine spread. This was the first time in my life that I had had so conventional a thought process. 

My conception of interior space and decor had run through more bohemian territory with witty references to convention. I had at one time lived with a housemate who brought with him an iron bathtub set up on pieces of lumber that we filled with cushions and used as a place to lie in and read. It was the most comfortable piece of furniture any of us had experienced. When he moved into his own house taking his "couch" with him, I recreated the bathtub couch and being unable to find claw feet set it up on galvanized plumbing pipe connectors which I painted to look like elephant feet.

Our house in Thailand had a wide bench with Danish modern legs. Upholstered in turquoise Chiangmai cotton and furnished with throw pillows it had been my mother's idea of seating. When I took possession of it I just had to replace the worn out cushions. In the same house we also had one of those hanging rattan basket chairs popular in the '60s. My father designed built-in counter height cabinets that ran along one wall and served as a workspace while my mother had another cabinet that served as a sewing table. These were built by the carpentry shop on the corner and made up in teak. There was also a bar with two swiveling teak wood stools. Along with the marble coffee table on tapered legs that matched the couch this was our hip mid-century modern living room. The apple does not fall far from the tree in this arena of house decor I realized.

A couch would offer a place to lie down that would not entail climbing up to the loft or crawling into a hammock. And of course it would be good if whatever I built would serve more than one function. I had already decided that the cooler would sit against the wall opposite of the kitchen and serve as seating. This led me to design a bench to slide over the cooler paired with another one for storage for my sewing machine. I made cushions from the leftover memory foam I had cut off the topper of my minimalist mattress and bought good quality upholstery fabric to go with the blue green of the kitchen. Frugal style is knowing where to spend your money.

As for a dining room table, there were plenty of drop down tables built in tiny houses and that Ikea roll around table with two folding leaves and drawers in the center was also popular with tiny house people. The engineering of the drop down table was quite complex. I could do it given the wall space I had, but the legs were a problem with benches. After much drawing and research I realized that I already had a table I liked perfectly well. It had been a utility table for a computer printer that I had rescued from an office move. The polished blond wood and chrome legs were pleasing to the eye. The legs had wheels and a storage shelf at the bottom. I'd been using it for my sewing table. I could add fold down leaves to it and make it into a dining room table. And it would roll into the space under the stairs where I had originally planned to put the cooler. I could postpone adding the drop down leaves since it would not be a built in so I would not have to build it before moving the house.

With the bench and cushion covers in the works I turned my attention to shelving. I wanted as much footage as I could fit for my book collection. I was not a minimalist Kindle person. I had amassed a book collection in preparation for a collapse of the electrical grid. I had books to help me homestead an off grid life, build shelter and grow food. Books for home maintenance and fixing things for clients. Plus all my shamanic books and autobiographies of interesting lives that I hadn't read yet. I was after all a writer. I needed books. 

It was easy enough to make shelving from doors, but what to use for shelf supports? I could make wood farmer style supports, but that was too much work. Shelf supports were a decorative fashion thing I noted, but also a bonafide piece of hardware. I could indulge in buying shelf supports. I chose some plain iron ones that looked like a blacksmith might have hewn them. There were also some inexpensive hyper modern ones I'd never seen before that functioned like the hinge on a fold out desk holding the shelves at both ends. These were clever and minimalist with the added feature of serving as book ends. They came in white and the shelves were white which picked up the white of the window frames. When I installed all the shelves things finally began to look like a house. It was not just a couch then that makes it a house. Shelves and the ownership of things to put on them added significantly to the iconography that says here is a house.


On the kitchen side I had long planned to make shelves out of the strip of desktop I had cut off when I made my kitchen counter. I made two shelves of different lengths to accommodate my Berkey Filter that would serve as my water dispenser for drinking water. The rounded edges of the shelves matched the kitchen counter top in a very satisfying way. When adorned with my gold rimmed cocktail glasses I had saved from a client this definitely said house beautiful.

Speaking of client gifts, I had a number of such gifts from clients who were eager to contribute to my tiny house. I now had a rather butch quilt made by a client's grandmother from mens shirts and pants in a plain pattern of simple squares. The client had gone to the trouble of washing it several times to rid it of its musty smell just so she could offer it for my use. I was touched by this. I'd also been given a folding travel iron, a mirror, silverware, bachelor casserole dishes and most interesting a velvet curtain that had gone over the door of a client's therapist's office to muffle sound.


After discussion with Sheilagh over matters of privacy in the tiny house we decided that the loo needed a privacy curtain, but the shower did not since such an act of bathing would not be shared with guests in the house unless a lover in which case the act of bathing would be willingly shared. And since I would not be spraying water over me I would not have to contain shower spray with a curtain. Pouring water was a much more controlled use of water. Thus the burgundy curtain became the privacy curtain for the loo adding a luxurious touch of class. Fishing shacks most definitely did not have velvet curtains.

Satisfied that I had firmly established that this was a house with all the functions of a house I was ready to move.


Saturday, October 1, 2016

The Afterlife Of Poop: Behind the Scenes on Composting Toilets

Apart from my tribe of lesbian brothers (who are off-grid cabin enthusiasts) I was not surprised that few of my circle have experienced a composting toilet. When I show pictures of my homemade toilet only then have people wondered how they work. There is a high tech expectation that a composting toilet has some internal ability to disappear what is put in it. And while there are sophisticated ones that reduce the solids to a decomposed form through the use of a hand crank, fan and heater, the collection chamber must still be emptied. 

In a large house the chamber can be under the floor with an access door to the outside. There is no need to address the after life of poop for a year or so at which point it is no longer poop. But in a tiny house on wheels the process is much more intimate. In a homemade bucket toilet such as mine, my poop (and all my friends' should they gift me with a deposit) is with me for a week to a month lying quietly in a bed of sawdust and toilet paper. I admit that even I had some qualms about this fact. It felt like hoarding of the most extreme variety. And I must quickly avert my mind to the value of engaging in this cycle of nature that turns digested waste into soil and in turn to food again. And the comforting thought that humans carry all the essential minerals in bodily excreta to create soil to grow food that then provides us with essential minerals. This means we carry with us the ability to bring back fertility to a depleted planet. (This life saving factor aptly demonstrated in the movie The Martian.) How wondrous is that? What a complete package we humans are.

Thankfully the poop removal job has been made virtually odorless by the separation of solids from liquids. Modern composting toilets have caught on to this factor. So there are two containers to empty and process, one for liquids and one for solids. The urine being enclosed in a container with a screw top is easily carried out. Some toilets even divert the urine to a container outside for ease of emptying. 

Urine being rich in nitrogen and phosphorous and having the benefit of being sterile is immediately useful for fertilizing plants. It must first be diluted with water at least 3 to 1 or it will burn the plant. From my workshop at an eco farm I learned that if mixed with a cup of sugar or molasses, diluted urine is made more accessible to plants. Urine can also be added to the compost pile which would help to keep it moist while the nitrogen and phosphorous is preserved in the resulting compost. Seen here is a urine toilet I visited recently at an eco village that used sawdust to absorb the liquid which was then dumped into a compost heap.

Then there is the removal of solids. In a homemade toilet this consists of removing the bucket inside the toilet and taking it to a dedicated compost container in your backyard. (You can also line the bucket with a plastic bag and pitch it, bag and all, in your garbage can as people do everyday with dog poop.) Commercial composting toilets can be more difficult to empty if they have no removable bucket. The one seen on Tiny House Nation called Nature's Head ($960) requires that the whole toilet be unscrewed from the base and taken outside. Granted the hand crank prompts more decomposition and drying and shrinkage before it needs to be emptied so not quite as vivid an experience (but the toilet paper may still be visible). Such details of compost removal is never demonstrated or even mentioned on the show I've noticed. I suspect it would disturb the viewer and scare off advertisers.

A dedicated compost pile or container for humanure composting is the rule. Rest assured that such a compost pile when done correctly will heat up to the high temperatures required to kill off pathogens. It is the size of the pile that determines if it heats up enough. About a cubic yard will do it. Leaving it for a year will also allow for the digestion of any pathogens by microbes, bacteria and earth worms. The weak link of this system is the rinsing out of the bucket. This must be done over the compost pile warns the Humanure Handbook whose author is amusingly verbose in the history and science of humanure composting. (A boiled down 12 page manual is available here.) Lining the bucket with a compostable bag which is then deposited in the compost pile could work too. I was also intrigued by this research paper by the Natural Resources Conservation Service on composting dog poop on a large scale that describes the process in a few pages of concise instruction.

If you cannot face this poop removal lifestyle there are other tiny house toilet systems to consider. For the complete overkill experience there is a toilet called the incinolet for $1849 that zaps the poop to ash with a jolt of high wattage electricity. Or if you like neat packages another toilet called the DryFlush Laveo for $590 plus disposable liners uses diaper pail technology to wrap each deposit in plastic after all the air is squeezed out. Needless to say both these options fall short for the eco minded and frugal.

Humanure composting has entranced me since I first learned about it in the '90s. It made using clean drinking water as a vehicle for transporting poop to a giant central processing plant seem absurd especially considering the difficulty of getting that clean drinking water drinkable in the first place. Plus all the chemicals added to the sewage sludge to render it "safe" before it is trucked out to farms to be laid on fields as fertilizer under the banner of organic matter. (The nerve.) This chemical interference which includes all manner of poisons thrown into sewers (informative blog devoted to the topic here) and rendering our soil ever more harmful and our food less nutritious. The nitrogen leaching out into our waterways has also caused algae blooms that have rendered beautiful lakes and ponds green and dead. A complete fiasco especially considering that depletion of phosphorous in soil is now a world crisis.

And when I learned from my construction technology class how our sewage is processed locally in huge open tanks which can overflow into the bay after a heavy rainfall, the yuck factor made a composting toilet seem much the simpler safer alternative. (Additional tanks can be built to take care of this overflow from processing plants, but I doubt if this has been a priority in our municipality.)

The flush toilet is so much a part of our society that to contemplate using anything but water to flush our poop off site far away seems heretical. When people balk at composting toilets I see how our modern technologies have so obfuscated natural processes that we no longer understand what is actually safe and what our elaborate centralized systems have done to throw nature out of balance. 

Composting was a way to take myself off this land intensive, water wasteful, chemical system and return to a basic, localized mellow process that would improve the very soil around me. In fact my fondness for compost is such that it may have been one of the reasons I have so eagerly embraced the tiny house lifestyle.

Friday, September 9, 2016

Tiny House Dry Run

My Canadian girlfriend Sheilagh came down from Vancouver to help me break in the tiny house. We would spend one night in it then head for a friend's cabin in Inverness which I figured would seem palatial by comparison. My aim was to serve a meal, wash up and sleep in the tiny house therefore testing the essential components. I had also offered a foot bath in the shower pan so on the way home from the airport we stopped at the hardware store to pick up an elbow so I could divert water from the drain into the rose bushes.

It was fun having Sheilagh there putting the house through its paces despite not being hooked up to water yet. So the first chore was to fill a 5 gallon bucket with water and bring it into the house where we put it in the shower pan. I was also dismayed to find that the sink drain leaked likely because I had not put enough silicone down when I installed it. So we had to make do with spitting into the shower pan drain while brushing teeth.


Dinner was relatively easy since I only had to boil water for peas and heat a pre-made casserole in the new toaster oven. I managed to find one big enough to fit a small casserole dish and found it on clearance at B,B & B for only $15. I marveled at my good luck. I was also delighted to discover that my little butane stove fit nicely into the drawer of the desk tower facing the shower pan which would allow it some air from the window above. This stove was already part of my earthquake arsenal. I have another as a back-up and a camping stove to use up those small propane canisters people are always having to throw out when they move.


Since I lack a dinette and have yet to make a fold down table, I brought a card table from home for us to eat off along with folding wooden chairs. I also brought out my camp chairs for us to sit in, but they were not quite right being too big a footprint for the space. Plus they gave the house the look of a hunting lodge or fishing shack. But they were perfect for pulling up to the shower pan for our foot bath. (For which I made sure to bring the Epsom salts.)


As for the washing up I was happy with my assortment of dish pans for scraping, soaping and rinsing all the dishes. It was easy to sit on the wall of the shower pan to wash the dishes. I did remember to bring dishwashing soap (the biodegradable Dr. Bronner's) and my favorite washing up brush. Sheilagh dried the dishes as I rinsed them, but I'm thinking about installing a removable wire shelf for the drying of dishes.


This report would not be complete without a note about the tiny house facilities in use. There is a very popular off the shelf toilet that you see in all the Tiny House Nation episodes. It costs $1,000 to $1,500 and according to one friend these manufactured composting toilets are more difficult to clean out than a simple bucket toilet due to the fan drying the contents to a crust. The price was a barrier for me so in 2010 I set out to make one inspired by the book Liquid Gold by Carol Steinfeld which I reviewed on flickr (which led to my becoming friends with Carol). Also reviewed is the classic Humanure Handbook. Two important books in the world of off-grid living. At the time I used my DIY toilet for an urban camping expedition where I was camping in the yard of some rental property we owned.


Carol's book convinced me that separating the urine from the rest was the key to an odorless toilet and so it is.

The challenge is to figure out how to separate the two. I used a funnel in mine. And found an oil pan I liked to drain it into. The oil pan lies flat in the bankers box I had on hand. I combined that with the city provided compost bucket.


I focused most of my effort on the housing which I made from a wine box and two pieces of 1 x 12 for legs, hand rubbed with linseed oil. I needed a seat to make it complete and chose the light weight plastic one I found at Ikea. Much more comfortable than what you buy for emergency kits that fit over a 5 gallon bucket.

This effort has sufficed, but I have plans to make another toilet specifically for the tiny house using a chair. Because I can feel people flinch when they see a toilet out in the open in a living space. To afford some privacy for us I hung up a shower curtain for the duration.

For our trial run I repurposed a wooden recipe box to use as a sawdust container and added a garden trowel. I have been collecting sawdust from all the wood I've been cutting and storing it in a pet food container a client was throwing out.


Using a composting toilet seems to be the barrier to many people adopting the tiny house lifestyle. Sheilagh was such a good sport about it that it made me love her for that reason alone. She said the whole experience reminded her of her tree planting days in Northern Alberta. We also duly noted that my minimalist 3" memory foam mattress topper on top of the rubber gym mats was perfectly comfortable. And she was thrilled that I had it equipped with a red Canadian Hudson Bay wool blanket.


Wednesday, August 31, 2016

The Bitchen: Bathroom + Kitchen

Tim came over to help me install the shower pan and shower surround. When he saw the roofing panels he asked me if I didn't want to install a fiberglass shower surround.

"That would just be too suburban," I said.

"I knew I missed you," he said. It took him much longer to install my corrugated roofing panels, but it was worth it. He had to install a backer board to support the corner. And cut the panel to fit at the end. Then screw it all down with numerous screws. We will trim the edges with wood later.

I love the shimmering reflective surface. It is a humble building material that reminds me of Thailand. Yet it also has a modern industrial look to it.

Protecting the surface did worry me. I didn't want it to rust. Others who had used galvanized metal just sprayed on the Rustoleum clear aerosol, but aerosol products are against my religion. I chose the Rustoleum clear latex and brushed it on. It sagged a bit, but I just kept brushing it upward. At the end of the job I read the back of the can and it said not to use it on metal. Well heck. Then I read another tutorial on using galvanized roofing for a shower and they didn't protect it with any product and reported that it just dulled over time. So we'll see.

The drain for the shower pan proved a challenge to find at my local hardware store. Standard shower pans use a much bigger drain. This being an RV shower pan it had only a 2" drain. In the end I had to order a drain from an RV site. I chose one with a stopper so I could use the shower pan as a giant foot bath and a sink if needed. The RV pan has much higher sides than a conventional one so gave me this option. I hadn't decided whether to go with a conventional shower pan or an RV pan, but in the end I had to choose the RV pan because I was afraid the drain hole would land on top of one of the beams of the trailer below. Only RV pans offer a drain on the side like this. I also worried about how it would be installed because conventional shower pans need to be mudded in to drain properly. It turns out that the RV pan comes with a very thick styrofoam base that supports the pan so it drains properly. Tim had to cut some of the wood away from the wall to get it to line up flush to the wall. This was a better idea than trying to fill the void with wood as I had thought to do.

While Tim worked on the shower I worked on my kitchen cupboard doors. I had assembled the door frames with the Kreg tool and was satisfied with how that worked. I cut thin ply to cover the back of the doors and painted the ply to match. Then using the left over corrugated metal I cut pieces to fit inside the door frames. Tin snips were too arduous for cutting and left a mangled edge so I ventured to try the grinder with a metal cutting wheel and that worked well. I made sure to use the factory edge on the side that would be seen most and it looks fine.

I did not really like any of the door pulls I found at the hardware store although I would have used a nickel bar type handle if I had not found some conduit pipe hangers in my dad's workshop drawers. They inspired me to try making my own handles because they only had tabs on one side so did not need to be mounted flush. And when I held them up to the doors I found that I could mount them inside the frame which would then hold the conduit pipe away from the surface. This looked terrific when I put in the pieces of conduit pipe.


Having derived such cool handles I now needed to choose the right hinges. I tried gate style hinges, but they covered too much of the frame. It became clear that a butt hinge would mirror the shape of the handles in a very stylish way even though it would require the use of a chisel to cut a mortise for every single hinge twice. Style won out and I got out my chisels.


The completed cupboard door. Even though it took two pieces of leftover corrugated panel to cover the door you cannot see the joint. Such is the power of illusion. Viewed from above the line is not noticeable.


I also created a rolling cutting board cart to fit between the cabinets. It wasn't part of my design, but when I realized that I had made the counter taller than normal because I had forgotten to take into account the thickness of the counter I decided to make a pull out cart of the right height that would also give me the opportunity to work in a compost bucket for greater efficiency of clean up. And the height of the cart in turn created a perfect space for a trash can and recycling bin. The cart itself is only 8" wide but could support a cutting board of any width.

It took me a while to build this cart because of all the components that had to be painted separately. I again used pieces of doors which gives the shelves that nice thickness. Thin ply make up the back and side. I had a lot of conduit pipe left over from the 18 tables I made for a play two years ago so wanted to use it in the design. The construction is not as solid as I would want it to be because the conduit pipe flexes a little in the joint, but it is good enough.


I also took the trouble to install shelves in the back of the cabinet I got from the desk because Tim pointed out that there was space behind the drawers and he suggested I make a secret compartment. I decided I would make extra shelves which will come in handy for canned goods and other supplies.


Once installed the entire kitchen came together in a very satisfying way. All the components looked great together. I put in a different trash can I had in my office and the porthole gave the whole thing a nautical look like a ships galley.

You can also see the installation of my horse feeder sink which is simply screwed to the wall with lag bolts in the valleys of the corrugated panel. I ordered a sink drain from an RV store which was chrome and gave it a touch of class. Tim installed the hose bib which goes right through the wall and connects to an inlet valve for connecting to an outdoor hose. The inlet valve is another RV specialty item.

The wood counter is finished with 4 coats of Waterlox which is the preferred product for kitchen counters because it fills the pores of the wood and locks out moisture. It was easy to apply, but must dry 24 hours before it can be coated again. I was very pleased with how nicely that old desk cleaned up.

When I showed this picture on Facebook one of my fellow tiny house builders called it a Bitchen. It certainly isn't a bathroom in the conventional sense. I can still fit in the shower pan with the sink there and use it for bathing, but mostly it's a utility area for washing up. There is no shower head. Only a cold water tap. My intention is to fill the sink with cold water and add hot water from my electric kettle. Then pour water over myself Thai style. I couldn't be happier with how it all turned out.

Tuesday, August 16, 2016

Salvaged Paint Covers Multitude of Sins

When you build with mismatched scrap wood, paint goes a long way to giving the completed unit a finished look. I'm not sure how I feel about this scratched up dragging technique. It looks like a bad paint job though in a stylish way so appears intentional. It certainly distracts from any imperfections in the wood and joinery.

Dragging a brush through wet paint was a popular technique for walls in Victorian times which favored rich textures in decor. A number of painting techniques were derived including ragging (rolling a rag through paint) and lots of faux furniture finishes. I loved the book "Paint Magic" by Jocasta Innes though I rarely had the patience to do more than sponging two colors.


As for mixing paint I read an article once about a painter of San Francisco Victorians. He had a large collection of paint in quart cans in his truck and when he was on a job if he didn't have the color he wanted he would just mix it.

I collected the paints my clients were discarding in garage clean-outs, then culled it down to gloss or semi-gloss or flats of strong colors. And if these colors weren't right for a project I'd mix a new color. Some of these paints were 20 years old in cans with rusty rims. But as long as the paint could be stirred into a smooth consistency with no solid bits they were fine. Sometimes adding water would help.

It was always an experiment not the sure thing that a paint chip would provide, but paint chips have notoriously turned out to be the wrong choice due to operator perception error. Or you end up trying out 14 different colors looking for just that certain shade you saw at someone's house. Better that you are making samples as you go and if you mix it yourself you are more likely to like it hooked, as it were, by the transformation of it all.


I started with a base coat of a grey green from the Ralph Lauren collection. I am not a designer label person but the color choices are nice. It tugged at me in a visceral way (which Mr. Lauren probably intended thus his success). I liked it better than the blue grey I had. Then I mixed some garish green and some deep blue paint to get the teal.

While browsing Pinterest for paint techniques I found a recipe for chalk paint and since I already had Plaster of Paris on hand I decided to try making chalk paint. And while I was looking in my paint stuff I found a wallpaper brush I bought once because I liked the old world look of it. I decided to use this brush for the dragging part.


The recipe I used was 1/4 cup water, 1/4 cup plaster of paris, 3/4 cups latex paint. It expanded the amount of paint and toned down the intensity of the color a tiny bit, but it dried chalky as promised. Then because I wanted a washable surface for my kitchen I put on a final coat of semi-gloss varnish from a job refinishing desks for an office. Now it was no longer a chalk paint except where I left it unvarnished inside cabinet doors. In the end I would have preferred a satin finish, but this project is all about reuse and a decorating preference did not justify buying new had it occurred to me beforehand.


Painting takes very little time to apply, but needs time to dry so it's nice to have a place to paint where I can leave it and work on it when I'm home with 15 minutes to fill here and there. I sure will miss my painting porch here at Ridge Ranch.


Tuesday, August 9, 2016

The Minimalist Mattress

Compared to the hard mattresses I grew up with, Western beds are way too soft. I realized this last time I came home from Thailand and my bed with mattress topper had me waking up feeling crumpled up. I did away with the topper and returned to my usual 4" foam mattress with egg crate topper and woke up feeling more aligned. So I was not surprised to read a medical research paper about instinctive human sleeping positions confirming that the body has a natural means of correcting most spinal and peripheral joint lesions while sleeping albeit on a much harder mattress than the deep mattresses we now buy. "When the head is down, the vertebrae are stretched between two anchors and every time the ribs move through breathing the tension is increased, the vertebrae realign themselves, and the movement keeps the joints lubricated." (It was also in this article that I learned how the "Asian squat" is an automatic manipulator for resetting of the sacroiliac joints.)


The blogger quoting this article said he slept on a 3" memory foam mattress topper. I decided this might be the way to go for the tiny house loft since every inch counts. There were lots of such toppers being sold on craigslist and they were snatched up quickly so before I could buy one for $20. I had also read that rubber gym mats improved the firmness of the thin mattresses found in RVs so I got six of those too from an online rubber mat store ($24). When I could finally get the two together it felt just right, said Goldilocks. I added an egg crate foam topper someone gave away on next door in case the memory foam felt too jelly like.

I cut the mattress to clear the loft ladder which made it 48" wide just big enough to accommodate a visiting lover and still allow a path to the closet. I had also thought about sleeping across the loft, but the sloping roofline coming down to my head felt odd in a bad feng shui sort of way. The topper was a queen size so what I cut off could make a narrow couch which inspired ideas about a couch that would separate into seating benches for dining.


Sheets were the next order of business, but a 48" wide mattress now only 3" thick is a very odd size. Fitted sheets for this size can be found on RV sites but are pricey. I could make my own I decided and found instructions to make fitted sheets. And while browsing ebay I found surplus army hospital sheets that were extra wide in a hospital scrubs blue green (for $19 including shipping). I'm a sucker for repurposing the unusual so ordered them (2 sheets and a pillow case), but they were so rough to the touch I wanted to start over. I gave them a wash in baking soda with a vinegar rinse to soften them and that took out enough of the stiffness to keep me interested. They should be ok after five washes or so.


Sunday, July 31, 2016

Rethinking The Shower

When I visited Ella, my instructor from the Tumbleweed workshop at her tiny house on wheels, she said something that stuck with me when it came to designing my bathroom. She no longer liked to use the shower because it just steamed up all the windows and makes her house damp. She worried about the impact of steam on her house. She did her bathing with a swim in the ocean.

Why have a shower at all? I asked myself. This was my chance to have a Thai bathroom with classic ceramic water jar and those ornately decorated silver bowls used to dip water to pour on ourselves. In Bangkok in the '60s the water pressure was often so low it didn't offer a good shower anyway. Plus we didn't have hot water in our house. (Few people bothered installing hot water systems in the tropics.) Every night my nanny would boil water on a brazier outdoors and haul the large kettle to our bathroom to mix the hot water into a tub with cold water from our water jar. This ritual of being so personally bathed was a fond memory. And now in this modern day we had electric kettles that would do for a hot water system. Why not just do with that? At least until I figured out a solar option. Why were showers so much the norm when half the world bathed from a bucket with a dipper? There was even a number of  YouTube tutorials on how to do so for the traveler. We in the West are so spoiled wanting our own indoor water fall plus there's all that water going down the drain while we wait for the heated water to come. All I needed was a water tight area that would house a drain or what is known as a wet bathroom. A shower pan would do the job.


Also plumbing a shower was a complexity I was happy to avoid. I looked around for a suitable container to use for a water jar. There were two lovely ceramic Chinese urns at the Home store already quite expensive at $60 each. I was sorely tempted, but the idea of a ceramic urn filled with water seemed like a liability when placed in a shower pan that might not bear the weight on a permanent basis. I thought of plastic water barrels, but I didn't like the idea of any heavy object sitting on a shower pan. I turned the problem around to a more utilitarian perspective. Why not just have a bucket hanging from the wall as I'd seen done in stables for watering horses? Those buckets were built to withstand being kicked across the stall.

While I was researching shower pans at Home Depot I fell in love with the shape known as a neo angle and knew this was the direction I would go in. After some in depth research about how to install a shower pan. I turned to the online RV supply houses. A tiny house could go either way with the installation of a shower pan. It could be mudded in with cement as they are in regular houses (I didn't fancy that job) or I could find out how it was done in RVs. But the prevailing problem I learned was that the drain could end up being blocked by one of the supporting beams of the trailer. And when I crawled under my tiny house to see, measuring the best I could where the dimensions of the pan would fall, I feared that the drain would land right on top of one of those beams. That clinched it. My best bet was to order an RV pan because the Better Bath brand offered one that could be had with a number of different drain placement options including one which would completely avoid the beam in question.


And when I studied the installation I could see that the mudding problem was solved with a thick styrofoam base already glued to the bottom of the pan. And while I was browsing the etrailer site I saw that they also offered a water inlet connector that could be installed through the wall so I could hook up a hose to a faucet inside the house. In my world this was a quantum leap from pushing a hose through the window. My tiny house builders had not made any concessions to plumbing and I did not want to take apart the wall to run plumbing through the house. I could however handle drilling a single hole through the wall along with the drain whole in the floor.

For the walls of my bathroom I loved the look of corrugated metal roofing. I bought one to see how it would look inside my house. The light danced off it in a pleasantly surprising way. I did long for something a little more built in than a bucket for the sink option.


I perused the horse supply site for a corner mounted water feeder; there was one, but it wouldn't work because the shower pan would require that I build out the corner at a 45° angle. I looked at other stable accessories and came across an urn like grain feeder in black. It had ribs coming down the round form that suggested a greek column. It was big enough to submerge my biggest pot and at the top it had a counter with a lip that would be perfect for a soap dish. The more I looked at this feeder the more intrigued I became. When I saw that it had a plug at the bottom I was confident that it would work for a sink.


Installation posed some interesting options. Such a feeder is usually just screwed to the wall, but would that hold the weight of water? I felt that I would have to reinforce the installation with lumber supports. Then one night I wondered what would happen if I made the sink removable in case I wanted to use the full space within the shower pan footprint. Whimsically it came to me that I could use a length of PVC pipe with a large diameter for a stand for my sink. The pipe would help support the weight and would also hide the drain pipe. Whether or not it was a removable sink I was now happy that my bathroom design had accomplished my goals and was going to be highly unique.

Wednesday, July 27, 2016

Old Desk To Be Transformed Into Kitchen

My stepmother asked me if I could take away this desk. A house guest had dragged it off the street and said he would come back and get it but never did. So inconsiderate. It's been sitting here for so long the varnish has pealed off from the afternoon sun streaming through the window of the garage.

I looked at the drawers and decided to use them in building a kitchen for the tiny house. I was tickled by the idea of such a transformative repurposing project. And I had read a convincing blog post about some remodelers sealing a wood counter with a product called Waterlox that held up terrifically. I had always wanted a wood counter in the kitchen.

In designing my kitchen I kept in mind all the very simple kitchens I had seen in my travels overseas that involved nothing more than a counter over some rudimentary shelves. All the things that North American kitchens seem to insist on like flush cabinet doors and european hinges, not to mention in ceiling task lighting every two feet are not necessary and just make the building of a kitchen a high end precision affair. Nor did I need drawers. Drawers are a disorganizing machine in my experience jostling everything about every time you open them and drawer organizers take up too much space. I would just hang up my utensils. But I did like having drawers in my bathroom and since the bathroom would be right next to the kitchen I began to design a unit that would incorporate a bathroom facing drawer unit.

I also decided to do away with the kitchen sink because cutting a hole in the counter subtracts from your counter space unless you make a sink cover which involves more precision work, plus you loose space underneath where the sink must be plumbed. Plumbing being another level of complexity. And if the sink wasn't big enough to wash my biggest pot it would only frustrate me. Others have said the same thing about their too small sink and moved dishwashing outside. I moved the dishwashing to the bathroom, which was essentially a shower pan, where I thought I would have a drop down wire shelf to support a dishpan or two or three in classic Thai farmstyle. I would have another shelf to dry the dishes on.


When Tim was here sealing the house I had him cut the top off the desk with his saws-all. (I could have looked for the screws and simply unscrewed it with less damage to the case, but I wanted to save time.) I then knocked the back panel off to separate the drawer units and unbolted them from the leg beam. 


While I was thinking about the layout of the kitchen I stripped the remaining varnish off the desk with my Silent Paint Remover. Basically a heating unit that works like a heat gun but covers more surface. When the varnish bubbles I quickly scrape. The trick was not leaving it so long that the bubbles got scorched black and left a mark. What varnish remained I got off with steal wool and a little sanding.

Once I had my measurements which included measuring all the pots and large equipment I wanted to store I began building my cabinets from doors. I used up my remaining doors on one, but there were three on craigslist for free just waiting for me to come get them. One was an old one with thick wood in it that would be sturdy. I had to do some scrubbing to get the pealing brown latex paint off it, but underneath was a serviceable white gloss. I took the trouble to fill the open cut ends with lumber because I was going to screw the pieces together at the edges. (I tried the Kreg Jig, but it didn't work with hollow core doors. It made it difficult to get the pieces flush and just made holes in the door skin.) For the top and bottom and the shelves inside the taller cabinet I cut down a stash of school room desk size pieces I had on hand that I had built to make sets for a play two years ago. This would save them going to landfill for they were too small for anything else. 


To build out the space where the drawers were to meet the front edge of the supporting cabinet, I made pantry size shelves from my stash of 4 ft, 1" by 12" pine boards that had been shelving. Another freebie from craigslist. There was enough left over to make frames for cabinet doors. I also saved the pull out desk extension shelves and cut one to fit my tall cabinet leaving the other where it was in the drawer unit. All this took most of the month to execute, but so far so good.

The desk top is five feet long, but I decided to cut it down to 4 1/2 feet to fit the space and leave room for a coat closet/broom cupboard. That's the challenge of designing for a small space. If you want something you have to subtract the space from something else. I also cut the depth down from the traditional 24" to 22" so it wouldn't protrude too much from the ladder to the loft. The only reason to keep to the traditional 24" is to accommodate most sinks. And if you don't have canisters sitting directly on the counter you won't miss those two inches. I tried all this out by measuring things in my current kitchen.